Fair warning up front: this chapter has fewer photos than I'd like. When you're racing the weather on a homestead build, the camera gets put down more often than picked up. We were focused on one thing — getting those bales up before the season turned on us. So instead of a polished documentary, what you're getting is the real story, told exactly as I remember it.
Which, honestly, might be better.
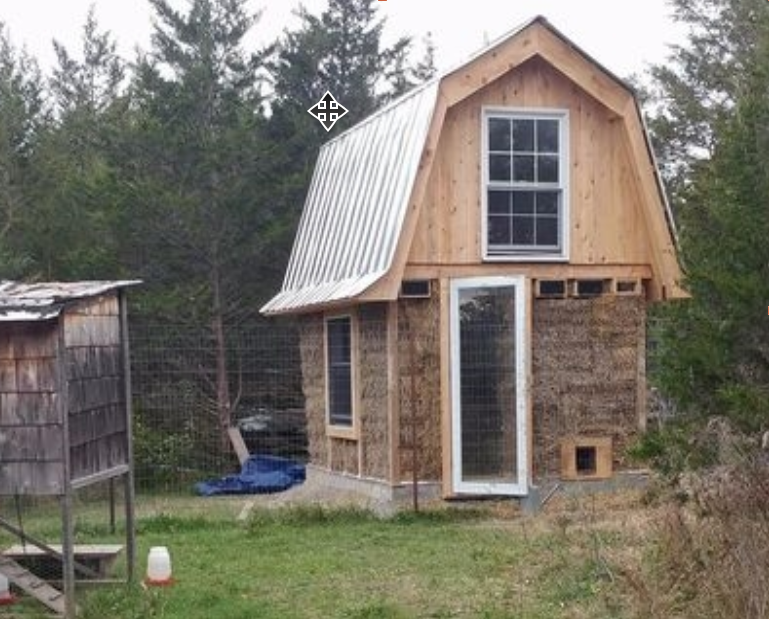
If you caught Chapter 1, you know we came into bale raising day with a serious foundation already under us — literally and figuratively. Before we touched a single bale, the structure was essentially ready to receive them.
The drip edge and the insulation between the sill plates are details that matter more than they might look like they do. They're what keep moisture from ever having a chance to wick up and touch the base of the bales. In straw bale construction, keeping water away from the bales isn't just a best practice — it's the whole game. Get it right at the base and you've solved 90% of your long-term concerns.
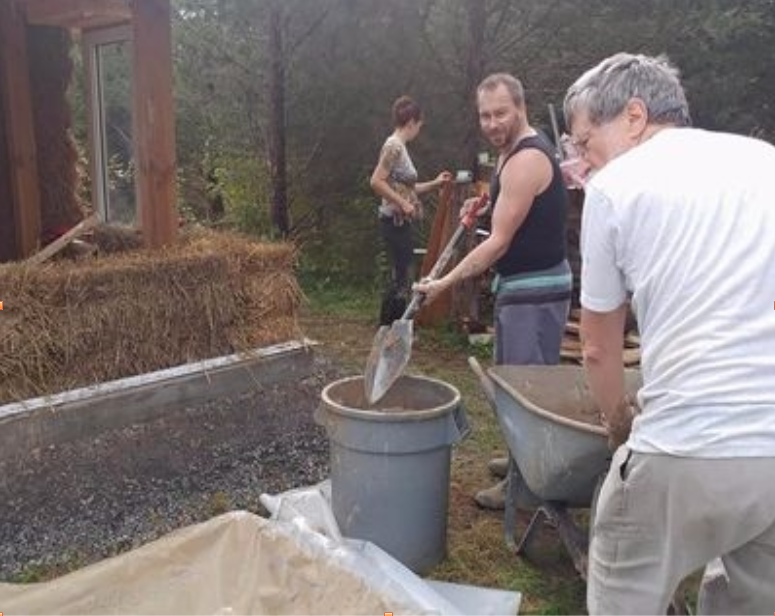
The bales arrived a couple of days before the big day and sat under tarps, waiting. We had two piles of sifted sand and clay left over from building the house — perfect raw material for plastering later. But first, we needed to make a slip pit.
Before a single bale goes up, you have to make clay slip. Think of it as a primer coat — you dip each bale into it before stacking, and it bonds the bale's surface fibres to the earthen plaster that'll come later. Without slip, the first plaster coat has nothing to grab onto.
The recipe is simple: clay and water, mixed until it reaches the consistency of heavy cream. We did this using a mixing paddle on a drill, working in a plastic garbage bucket in batches, then dumping each batch into the trough you see below. It sounds straightforward. It is not glamorous.
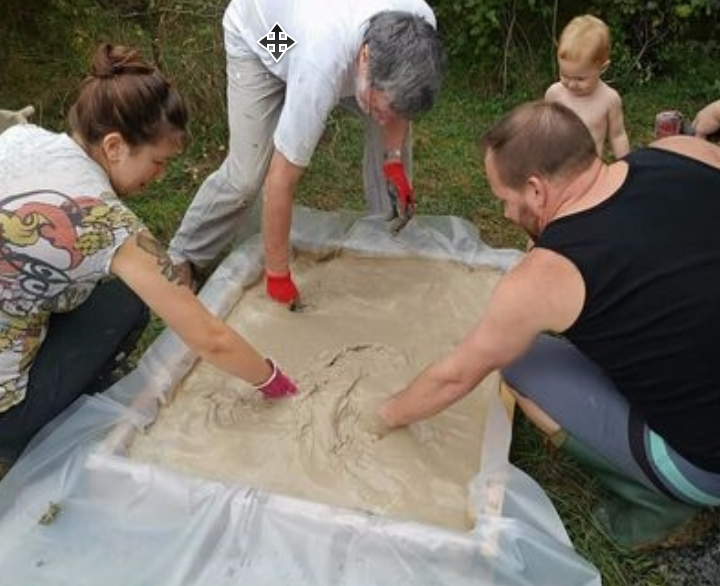
The slip pit setup — clay, water, and a drill. Messy before a single bale even goes in.
Once the slip is mixed to the right consistency and poured into the trough, you grab a bale, push the two outside faces down into it about 3 inches, pull it out dripping with clay, and carry it to the wall. Simple in theory. In practice, a bale that's just been dunked in clay slip weighs so much more than a dry bale that it genuinely takes two or three people to move it. And the clay goes absolutely everywhere.
The trough filled and ready. We were hoping Zoe would want to jump in and play. She looked at us like we'd lost our minds.
We chose an earthen plaster followed by a lime plaster for the coop — a slightly different approach than the house and studio, which we finished strictly with earthen plaster. More on the reasons for that when we get to plastering. For now, just know that the slip coat is what makes all of it stick.
Here's the sequence: dip the bale, heave it into position, set it about 2 inches in from the exterior foundation edge (leaving room for the plaster coat), and stack them like bricks — staggered courses, same as a mason would lay stone. The seam of one bale sits over the centre of the bale below it. No shortcuts on this. Staggering is what gives the wall its strength.
"Did I mention how messy it is? The clay slip goes on your hands, your arms, your face, your boots, the ground around the trough, the ground around the wall, the dog if she gets too close. Everything. Everywhere. All at once."
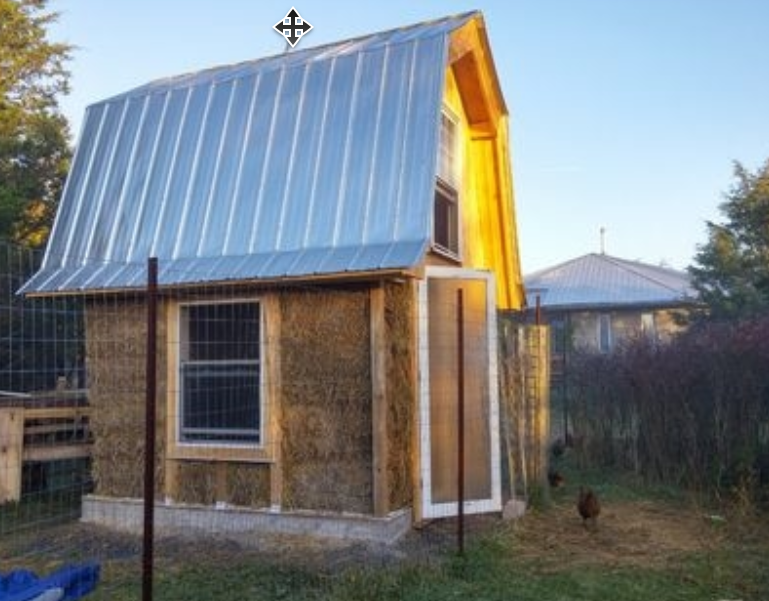
Getting the bales up. The clay slip makes them heavier than you'd ever expect — nothing about this part is delicate work.
In spots where a full-size bale would be too long, you have to create a custom one. That means cutting the strings, pulling out a flake (a compressed section of the bale) to shorten it, and retying. In spots where the top of a bale sits proud of the wall line, you trim it down. I used a chainsaw for this — running it like a plane, skimming off a little at a time so the chain didn't jam up on the straw. It works surprisingly well, and it's the kind of moment where 15 years as an ironworker earns its keep.
The wall taking shape. At this point the whole thing has a weight to it — literally and emotionally. You can finally see what you've been building toward.
Around windows and doors, the fitting gets even more precise. You're cutting bales to wedge snugly around the frames, pounding them into place with your knee, your boot, your fist — whatever works. They resist. You persist. The bale usually wins the first round. You win eventually.
Three people and one babysitter. One day. Every bale in the building, from the floor to the top plate. We were exhausted by the end of it in the very best way — the kind of tired you only get when you've done something that actually matters.
Once the bales are up, the next step is finding every gap and stuffing it. And there are gaps everywhere — between bales, around windows, at the tops of walls, in the corners. Everywhere two bales meet, there's the potential for a void, and voids are exactly what you don't want in a wall that's supposed to be airtight and thermally consistent.
The technique is low-tech: grab a fistful of straw, compact it as tightly as you can, fold it over on itself to keep it from springing apart, and shove it in. Repeat. For a long time.
- Earthen plaster (clay + sand + straw fibre) is the base coat on a straw bale wall. It's breathable, flexible, and bonds directly with the bale fibres — especially when slip-coated. Our house and studio are finished entirely in earthen plaster.
- Lime plaster is harder, more weather-resistant, and more durable over time. For the coop — which takes more abuse from weather, animals, and general farm life — we added a lime finish coat over the earthen base for extra protection.
- Both are completely natural materials. No VOCs, no synthetic binders. Just minerals and water — the same materials humans have been plastering buildings with for thousands of years.
- The two-coat system (earthen base, lime finish) is increasingly common in Ontario straw bale builds precisely because it gives you the best of both worlds: the perfect bond of earthen plaster where it counts, and the durability of lime on the exterior face.
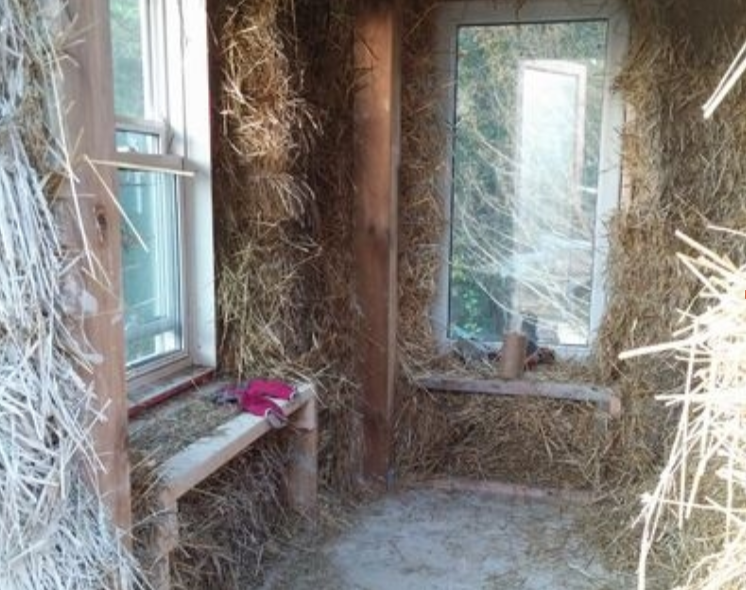
Stuffing the gaps — meditative in theory, maddening in practice. For every fistful that stays in, one falls out the other side.
The frustrating part — and I say this with genuine affection for the process — is that every fistful you shove in from one side tends to push the previously stuffed straw out the other side of the wall. You get into a rhythm of stuffing, reaching around, catching what fell, stuffing again. It takes a long time. It is absolutely worth doing.
And then, just like that — the walls are done.
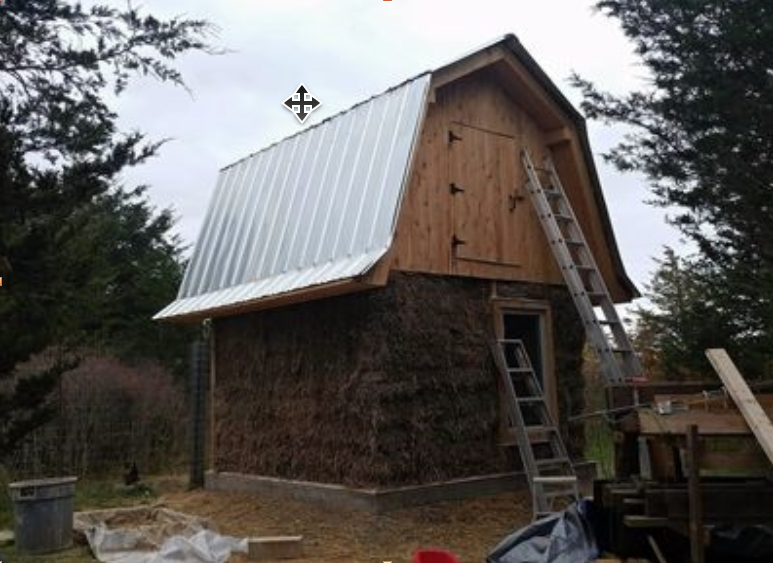
Bale raising complete. Four people, one day, and something that looks very much like a building. Plastering starts next.
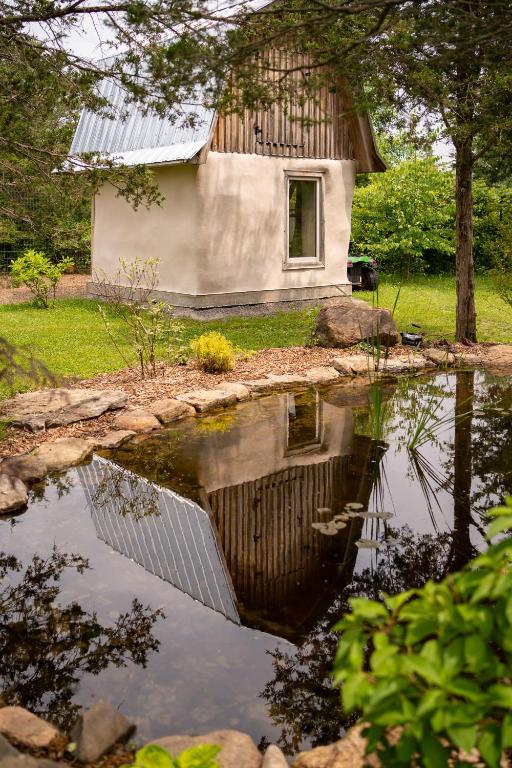
Standing back and looking at it at the end of the day — clay-covered, sore, the smell of straw and earth in the air — I remember thinking that no other building method in the world produces something that looks quite like this. Those thick, rounded walls. The warm, organic texture of the straw beneath the slip. It doesn't look like construction. It looks like something that belongs exactly where it is.
That feeling, by the way, is the whole point.

The County market, once a month — no noise.
CLAR MLS data, honest analysis, and what it means for buyers and sellers in Prince Edward County. One email a month.
- Real MLS data from CLAR every month
- No fluff, no spam — just what matters
- Unsubscribe any time, no questions asked
No spam. Ever. Unsubscribe any time.